Difference between revisions of "Adding a Light"
(add spotlight features, Gobo) |
|||
| (One intermediate revision by the same user not shown) | |||
| Line 7: | Line 7: | ||
[[File:NewLight.png]] | [[File:NewLight.png]] | ||
| − | A new spotlight is added | + | A new spotlight is added. |
| + | |||
| + | When in EDIT mode, spotlights show a ray in the direction they are pointing, so you can see what it is pointed at and also to help you find the light in a large zone. | ||
==Type of Light== | ==Type of Light== | ||
| Line 18: | Line 20: | ||
'''SPOT''' - shines a cone of light in a specific direction. | '''SPOT''' - shines a cone of light in a specific direction. | ||
| − | * SpotAngle - You can specify the angle of the diameter of the cone in degrees. | + | * SpotAngle - You can specify the angle of the diameter of the cone in radians (should be degrees). |
* Its intensity fades out (falloff) over distance. Adjust the amount of falloff with the third Attenuation value (set this by entering a value between 0 and 1) | * Its intensity fades out (falloff) over distance. Adjust the amount of falloff with the third Attenuation value (set this by entering a value between 0 and 1) | ||
* Set the AmbientColor to 0,0,0 so that only the cone of light is illuminated. | * Set the AmbientColor to 0,0,0 so that only the cone of light is illuminated. | ||
Latest revision as of 17:03, 9 November 2022
Adding a light
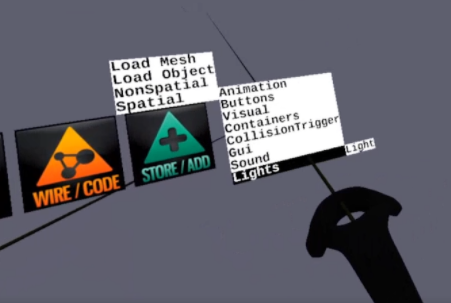
Choose Spatial -> Lights -> light
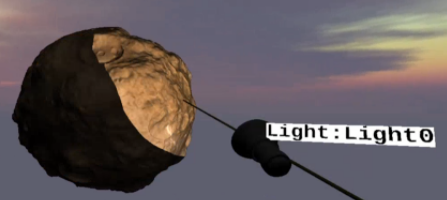
A new spotlight is added.
When in EDIT mode, spotlights show a ray in the direction they are pointing, so you can see what it is pointed at and also to help you find the light in a large zone.
Type of Light
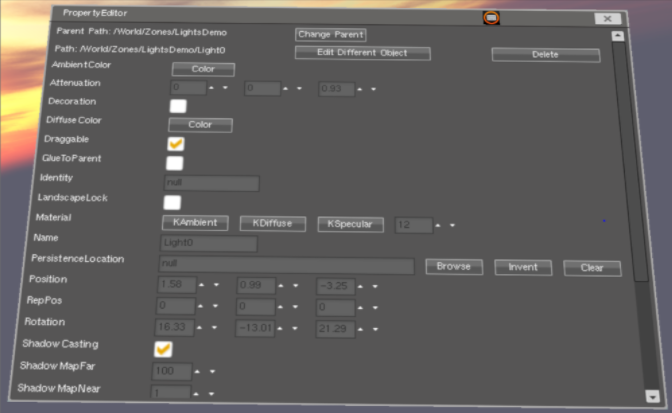
In the Property Editor for the light, you can choose 4 different types of lights (the default is a spotlight) and set the color and intensity (attenuation) and aimed direction (rotation) of a light
SPOT - shines a cone of light in a specific direction.
- SpotAngle - You can specify the angle of the diameter of the cone in radians (should be degrees).
- Its intensity fades out (falloff) over distance. Adjust the amount of falloff with the third Attenuation value (set this by entering a value between 0 and 1)
- Set the AmbientColor to 0,0,0 so that only the cone of light is illuminated.
- DiffuseColor sets the color of the cone of light.
- ShadowCasting - enable shadows
- SpotBlur - Blurs the edge of the circle that the spot projects. (set this by entering a value between 0 and 1)
- GoboResourceLocator - add an image file that the spot will project. Specify the .jpg image file.
- GoboEnabled - toggle the gobo projection on or off
- GoboRotationAngle - rotate the image
POINT - shines in all directions, from its location, like a light bulb. Same falloff as a spotlight.
DIRECTIONAL - shines parallel rays like the sun. It does not fade out over distance
AMBIENT - illuminates from all directions, sort of like from the sky acts like a huge light. It does not fade out over distance.
Color of light
- Ambient lighting: even when it is dark there is usually still some light somewhere in the world (the moon, a distant light) so objects are almost never completely dark. To simulate this we use an ambient lighting constant that always has the object reflecting some color.
- Diffuse lighting: simulates the directional impact a light object has on an object. This is the most visually significant component of the lighting model. The more a part of an object faces the light source, the brighter it becomes.
- Specular lighting: simulates the bright spot of a light that appears on shiny objects. Specular highlights are more inclined to the color of the light than the color of the object.
The ambient light is usually set to a low intensity because we don't want the ambient color to be too dominant. The diffuse component of a light source is usually set to the exact color we'd like a light to have; often a bright white color. The specular component is usually kept shining at full intensity. All three combine to become Phong reflection
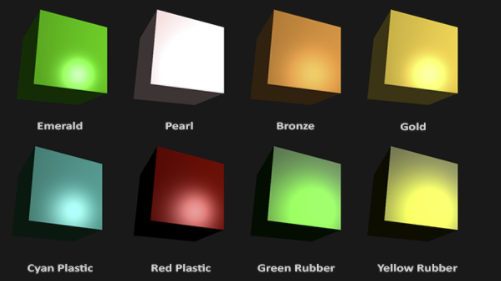
Color of materials
In the real world, each object has a different reaction to light. Steel objects are often shinier than a clay vase for example and a wooden container doesn't react the same to light as a steel container. Some objects reflect the light without much scattering resulting in small specular highlights and others scatter a lot giving the highlight a larger radius.
The ambient material defines what color the surface reflects under ambient lighting; this is usually the same as the surface's color.
The diffuse material defines the color of the surface under diffuse lighting. The diffuse color is (just like ambient lighting) set to the desired surface's color.
The specular sets the color of the specular highlight on the surface (or possibly even reflect a surface-specific color). Lastly, the shininess impacts the scattering/radius of the specular highlight.
Example materials settings: http://devernay.free.fr/cours/opengl/materials.html
Lighting Effects
- Fog lights: https://ijdykeman.github.io/graphics/simple_fog_shader - this is a simple technique that colors fog based on proximity to a light.
- Crepuscular rays. This is pretty cheap but requires a render to texture (hence previous ask for this) : https://fabiensanglard.net/lightScattering/
- Glow light - this is a fog light, but without the “fog” part
ProjectiveTextures
- ProjectiveTextures aka “Gobos” - uses a gobo at distance d and rotation r from a light along the light direction. Add the contribution of this texture to the surface. Might want to add an angular term for 180o. 360o can just be two lights back to back
- Mirror.water surface - render from POV of mirror and map to surface
Next: Adding Sound
