Creating Animated Models in Cinema4D
Jump to navigation
Jump to search
Steps to create an animated model using Cinema4D that will work with Constructive Labs software:
- Create a mesh model as usual in Cinema4D.
- Select the Front view
- Choose the Character->Joint tool.
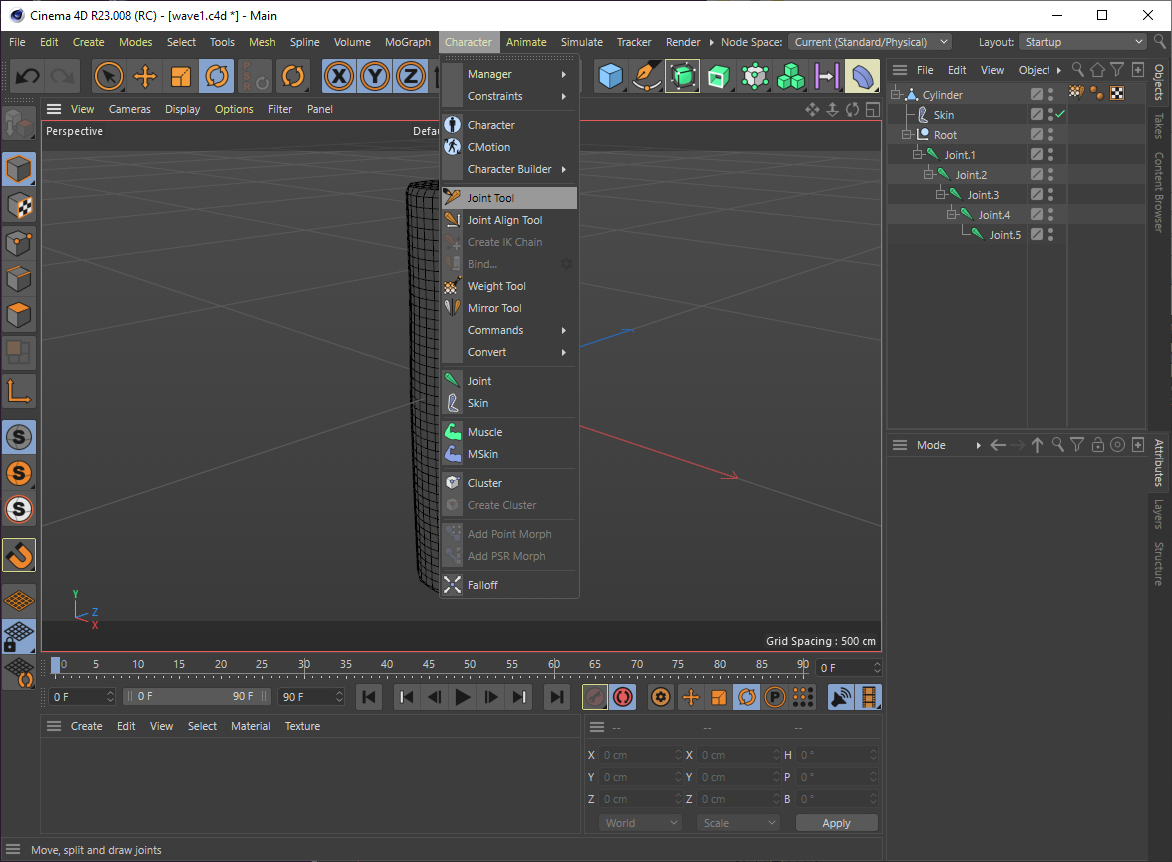
- Hold the CTRL key and click where the base of the skeleton should be (perhaps the bottom of the spine or the bottom of the model)
- Keep holding the CTRL key and click at each joint location to create a linked line of bones that follow along the center of the model mesh.
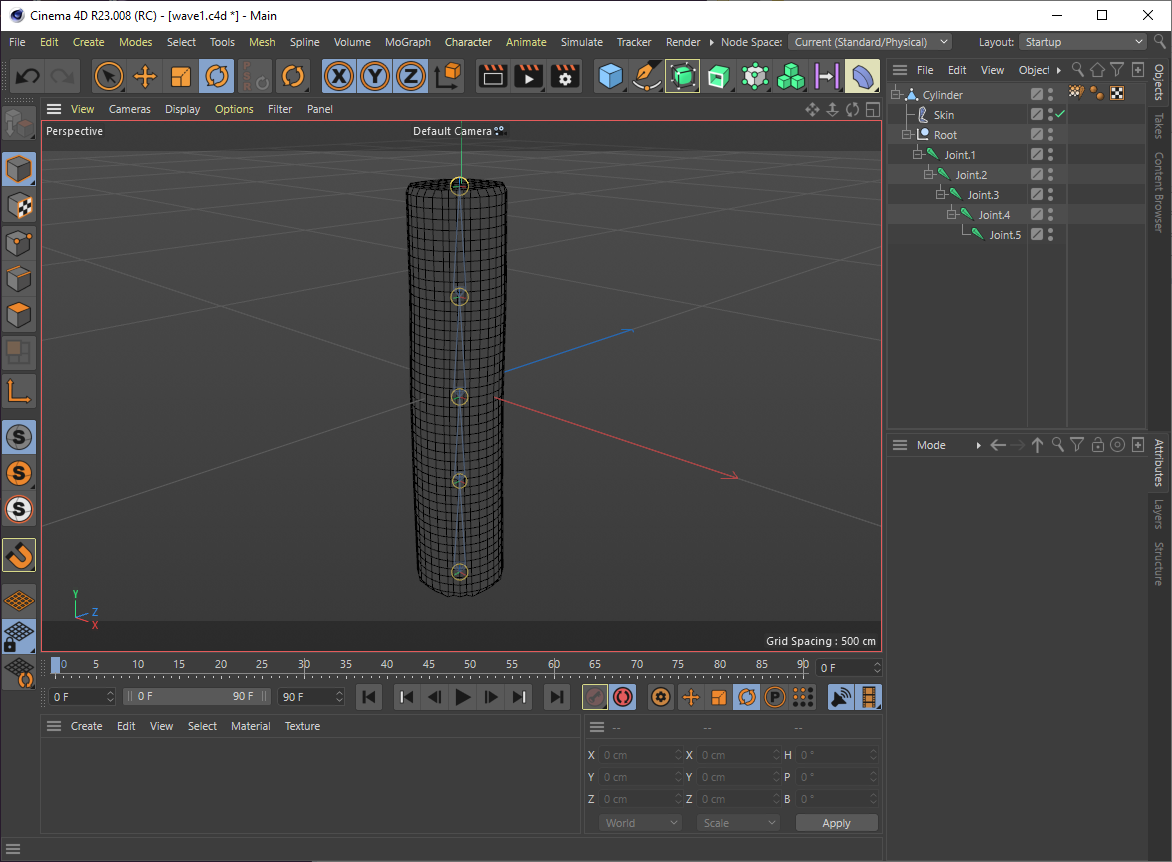
- When you have created all the bones, release the CTRL key and click anywhere outside the mesh to stop making bones.
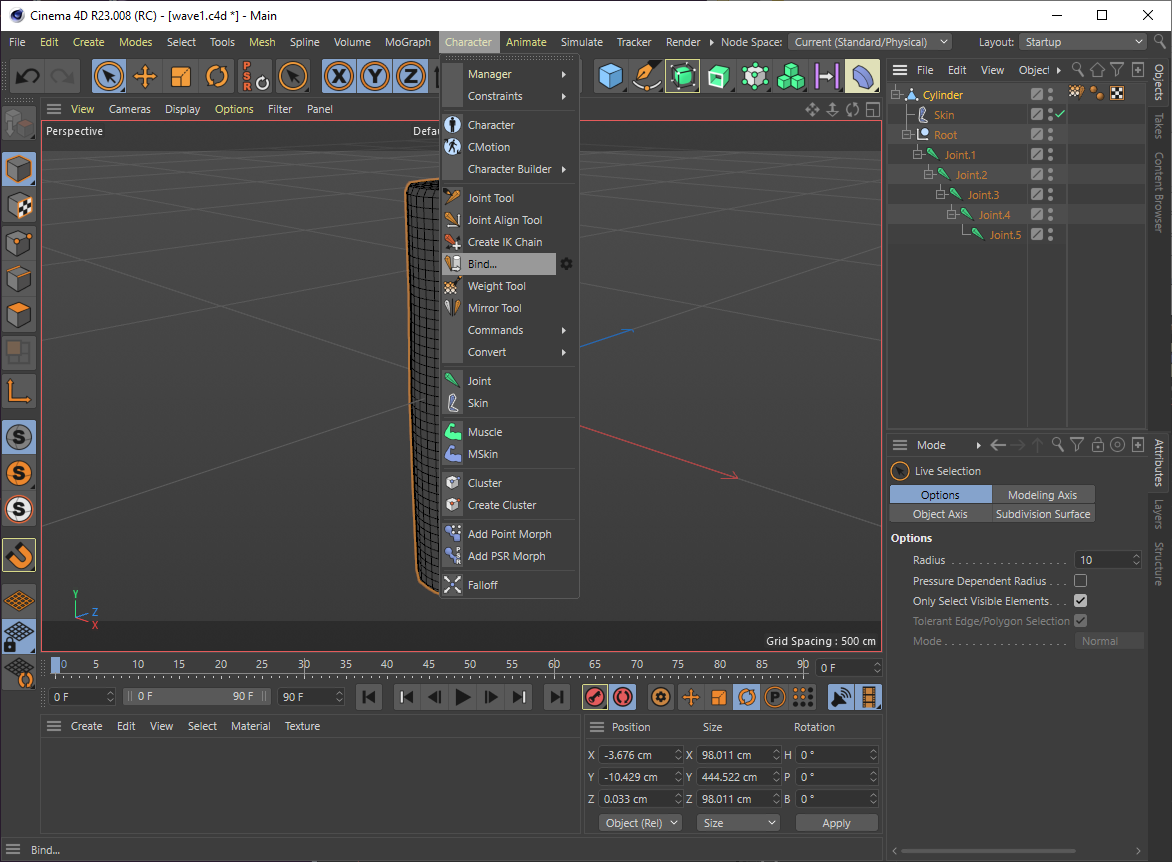
- Now you need to bind the bones to the mesh. Select all the bones (Easily done in the Object Browser by shift-clicking or ctrl-clicking on the names of the bones, so they are all selected)
- Hold the CTRL key and click on the name of the mesh in the Object Browser
- Choose Character->Bind... (now the bones are connected to the mesh.
- You should now be able to double-click on each bone and rotate it to form a pose.

- Now to record the animation, click on the Autokeying button (looks like an orange circle with parenthesis in it, located to the left of the Play button)

- Position the play-back frame indicator at frame zero and form a pose.
- Position the play-back frame indicator at another frame (say frame 30) and form another pose that the animation will transition to. Continue for all the poses you want in your animation.
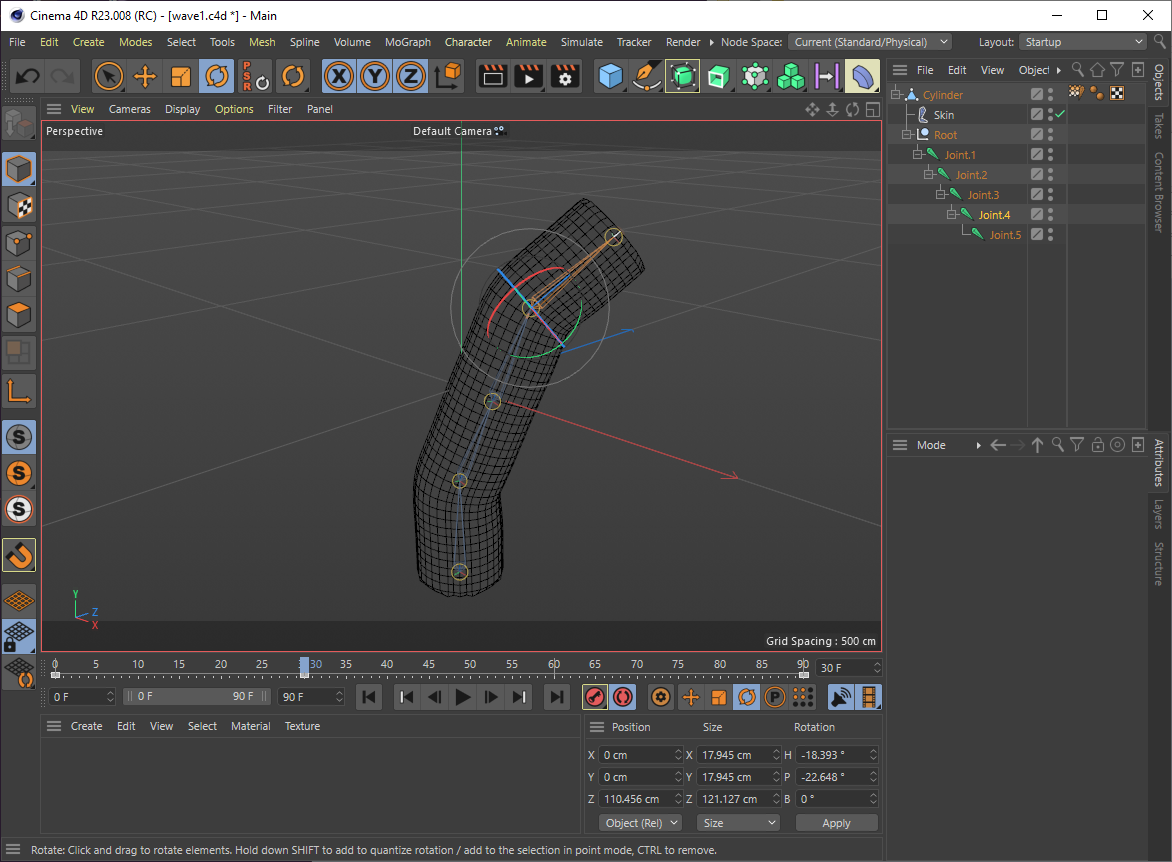
- Click the Play (triangle) button and you animation should start running. The model should smoothly deform to follow the changing bone positions.
- When you are satisfied with your animation, do File->Export->glTF to export the file in glb format for use in Constructive Labs.


